|
What
can happen when you use/steal a lightmap that wasn't made for your
repaint?
Here
are some examples of what can happen when a repaint uses a lightmap
that wasn't made for the specific repaint they were included with.
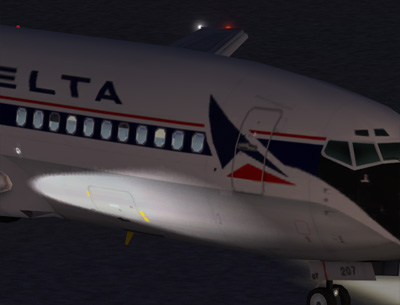
Here you see closed windows shades being illuminated at night
by a lightmap taken from some other repaint.
Often painters will create their own customized window shade arrangement
and make a customized lightmap for it. That's what you're seeing
here. |
|
| Here
are more closed windows shades being lit up at night as well as
the fuselage being illuminated where a window was plugged on the
repaint. |
|
|
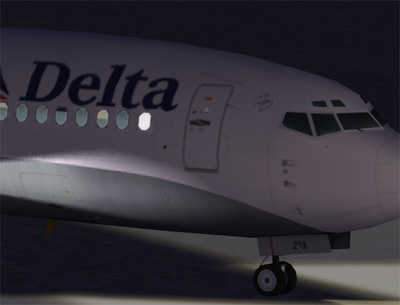
And more
of the same. White fuselages will light up much brighter than
the blue gray of the windows and will stand out like a sore
thumb at night.
Why a painter
would want to spend hours on a repaint and then just steal someone
else's lightmap and then not even look at it before uploading
is beyond us, but we've seen quite a few repaints like this
at avsim over the past few months.
|
|
So, how do you make a lightmap specific for your repaint?
It's quite easy
actually, but one of the reasons we suspect that people may be wary
of making lightmaps is because lightmaps also use an alpha channel
to turn the landing light splash on the fuselage on or off independent
of the rest of the lights or lit windows. Alpha channels can be tricky
to work with if you don't understand them, but for making a lightmap
(at least using an AIA lightmap paintkit) the alpha has already been
taken care of, and you don't have to worry about it at all.
1.
Make your repaint.
This
is just what it sounds like, you're painting the texture that people
will see on your airplane. To make the lightmap creation easier, just
use the provided window shade arrangement as that is what the lightmap
that came with the paintkit was made for. In our example we're going
to assume that the airline in question plugged some of the windows
on their aircraft. This is quite common in the airline industry. If
you were to just take a lightmap from someone else's repaint there's
a very good chance that some of your plugged windows are going to
be illuminated at night.
Once you've finished your repaint, save it as a .bmp. You will need
this anyway for converting it to the DXT format so that FS can see
it, but in the meantime, we'll use it as a background image while
making the lightmap.
2.
Open up the lightmap PSD.
When
you first open up the lightmap, it will be mostly black with windows
and landing light beams showing on it:
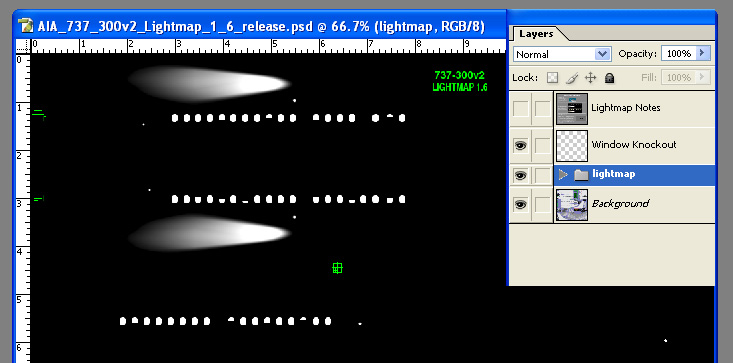
In order
to be able to see the bmp of your repaint we'll need to reduce the
opacity of this. In this example, all the pieces making up the lightmap
are contained within a folder/selection set called "lightmap".
There's no need to open that set up, just select it and lower the
opacity to 40 or 50%.
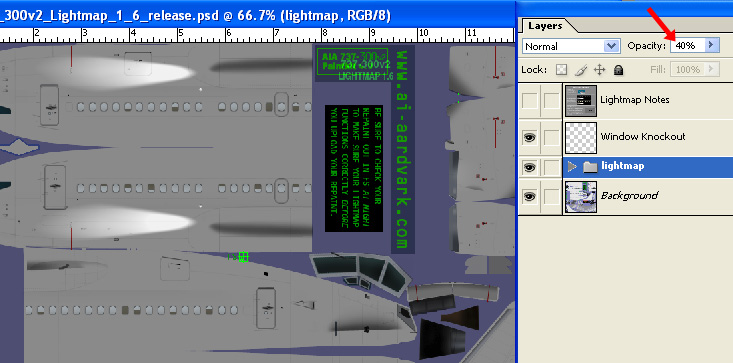
Now you can see the background layer beneath the lightmap.
3.
Add your repaint to the background
Now, open up your repaint bmp, copy it, and paste it in above the
"background" layer:
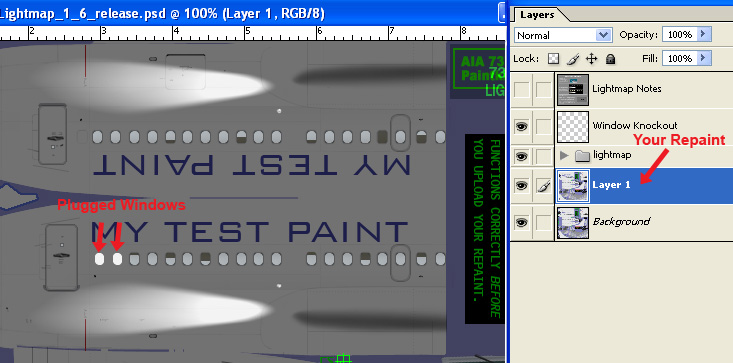
Your
plugged windows are pretty obvious now. They will show up much brighter
than the adjacent windows.
So, what we need to do is to knock them out.
This particular lightmap paintkit already has an empty layer called
"Window Knockout". If your paintkit doesn't have one, you
can just add a layer above all the layers that make up the lightmap.
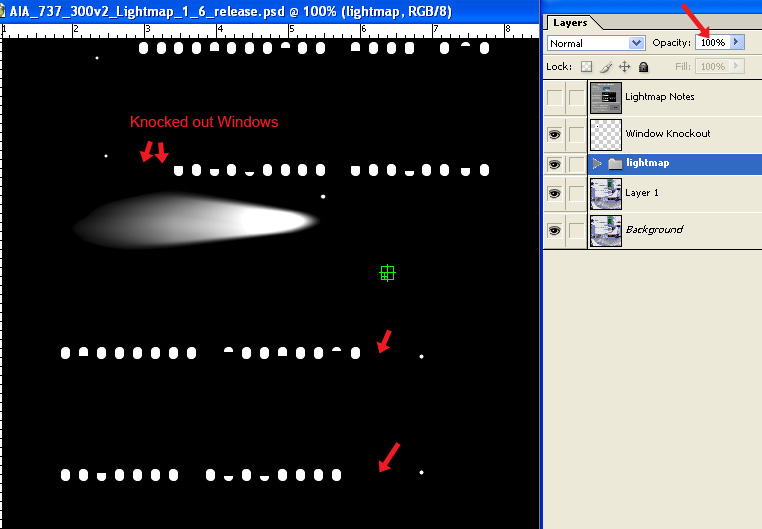
4.
Knock out those windows!
On the "window
knockout" layer use the marquee tool and drag a rectangle around
the windows that need to be knocked out:

Now
just fill that selection with black:
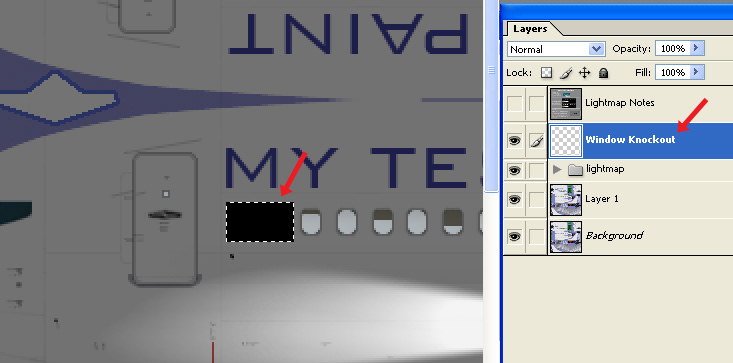
That
was easy! Now do the same thing to any other windows on your repaint
that need to be knocked out:

If
you want, put your name on the lightmap, or the airline repaint you've
made it for. This way you can see if someone steals it from your repaint
one day. More immediately though, it makes it easy when you're converting
to DXT to make sure you've actually loaded the correct lightmap, because
lightmaps pretty much all look the same.
Just be sure that whatever you add as identification is over the blank
areas of the texture, and not across any of the parts that are going
to show up on the model.
5.
Make the lightmap 100% opaque again.
This
will look almost exactly the same way it did when you started, but
the plugged windows on your repaint are now blacked out and won't
be lit up at night in FS:
6. Save, and save again...
If you
think you'll need this PSD again, go ahead and save it. But for use
in FS, we need to save it in a different format. So, select "Save
As", and then select "Targa" or "TGA" as
the format. Give it a name you'll remember, and hit "OK".
Now here's the most difficult part, you're going to be asked about
some saving options:

You
need to choose 32 bit. 32 bit is needed because of the alpha
channel we discussed earlier, but that you never saw while making
your lightmap.
7.
Convert it to DXT
Here we've opened
the saved targa up in DXTbmp:
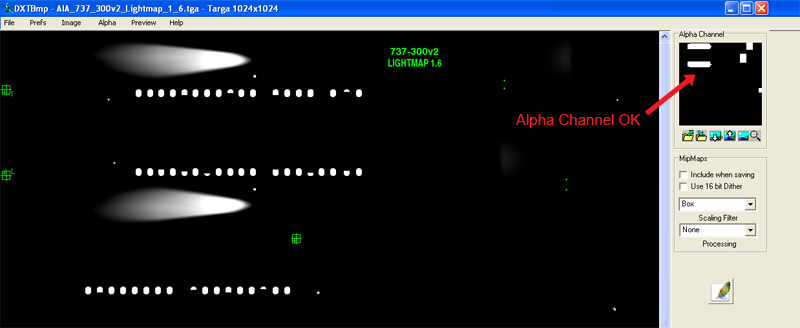
If
you put the repaint name on your lightmap as mentioned earlier, make
sure you see it here. Our airline name just happens to be "LIGHTMAP
1.6", so everything is good. Also, glance up at the upper right
where it's displaying the alpha channel and make sure it's there.
As long as you see some black and white areas, the alpha channel is
OK and you don't need to worry about it.
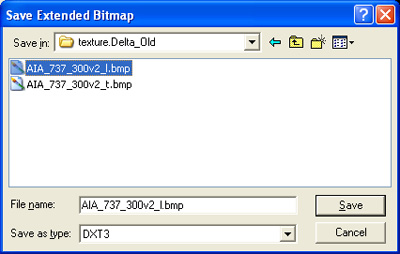
Now just save it
with the proper name and as Extended Bitmap/DXT3 format, and you're
done:
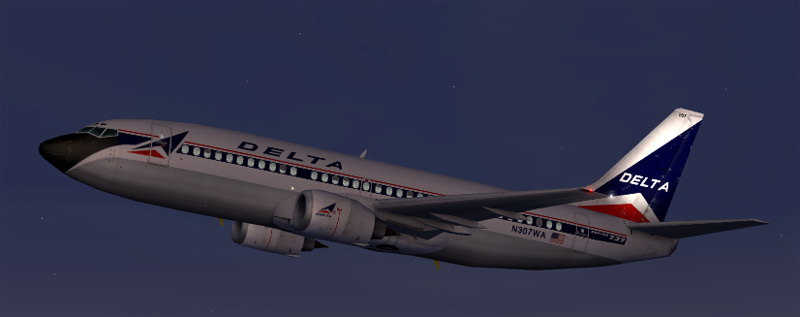
8. Check out your repaint in FS
After
you've converted your repaint as well to DXT, you can start up FS,
and see your repaint with no lit up windows shades or illuminated
pieces of fuselage:
No
matter how experienced a painter you are, you should ALWAYS check
out your repaint in FS at night to make sure your lightmap is working
correctly. Everyone has made a lightmap that didn't work as expected
at some point in their painting career.*
Well, that's all there is to making a lightmap, we hope we've removed
some of the unknowns from making a lightmap, and that you'll never
glance at someone else's lightmap again and think of just "borrowing"
it for your repaint.
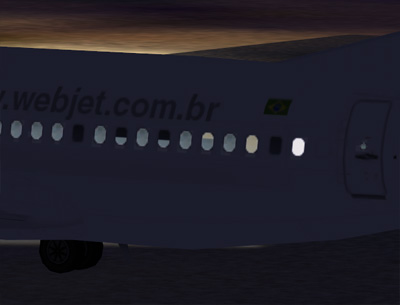
*Like this old Delta Airlines paint. Delta's
737-300's don't really have logo lights on the tail.
|